> ## Documentation Index
> Fetch the complete documentation index at: https://docs.metabind.ai/llms.txt
> Use this file to discover all available pages before exploring further.
# Build a Data Tool
> Create a Type backed by a data component that proxies your APIs through V8 sandboxes with injected secrets
A Data Tool is a Type backed by a data component. The AI calls it with structured input; the platform runs the component's `handler()` in a V8 sandbox to fetch data from external APIs, then returns structured JSON. This guide walks through building one.
## Prerequisites
* A project with `type: "mcp"`. See [Project setup](/guides/building/project-setup).
* An external API to wrap (REST or GraphQL).
* Familiarity with [Tools and Types](/guides/concepts/types).
## 1. Author a data component
A data component declares its input schema, output schema, and an async `handler` that runs in a sandbox:
```ts theme={null}
export default defineDataSource({
metadata: {
title: "Product Search",
description: "Search the product catalog by keyword or category"
},
properties: {
searchTerm: {
type: "string",
description: "Term to search for"
},
category: {
type: "string",
description: "Filter by category"
},
limit: {
type: "number",
description: "Max results to return",
validation: { min: 1, max: 50 },
defaultValue: 10
}
},
output: {
products: PropertyArray({
valueType: PropertyGroup({
properties: {
id: PropertyString({}),
name: PropertyString({}),
price: PropertyNumber({}),
inStock: PropertyBoolean({})
}
})
}),
total: PropertyNumber({})
},
annotations: { readOnlyHint: true },
handler: async (props, env) => {
const params = new URLSearchParams();
if (props.searchTerm) params.set("q", props.searchTerm);
if (props.category) params.set("category", props.category);
params.set("limit", String(props.limit ?? 10));
const res = await fetch(`https://api.example.com/products?${params}`, {
headers: {
"Authorization": `Bearer ${env.secrets.API_KEY}`
}
});
if (!res.ok) throw new Error(`API returned ${res.status}`);
return res.json();
}
});
```
Key differences from a layout component:
* `defineDataSource()` instead of `defineComponent()`.
* `handler` is `async` and performs I/O.
* An `output` schema is required — the data tool's response is validated against it before returning to the AI.
* The handler receives `(props, env)` instead of just `props`. Use `env.secrets`, `env.organizationId`, `env.projectId`, `env.apiBaseURL`, and `env.locale` rather than module-level constants.
* The return value is a plain JavaScript object — no BindJS components.
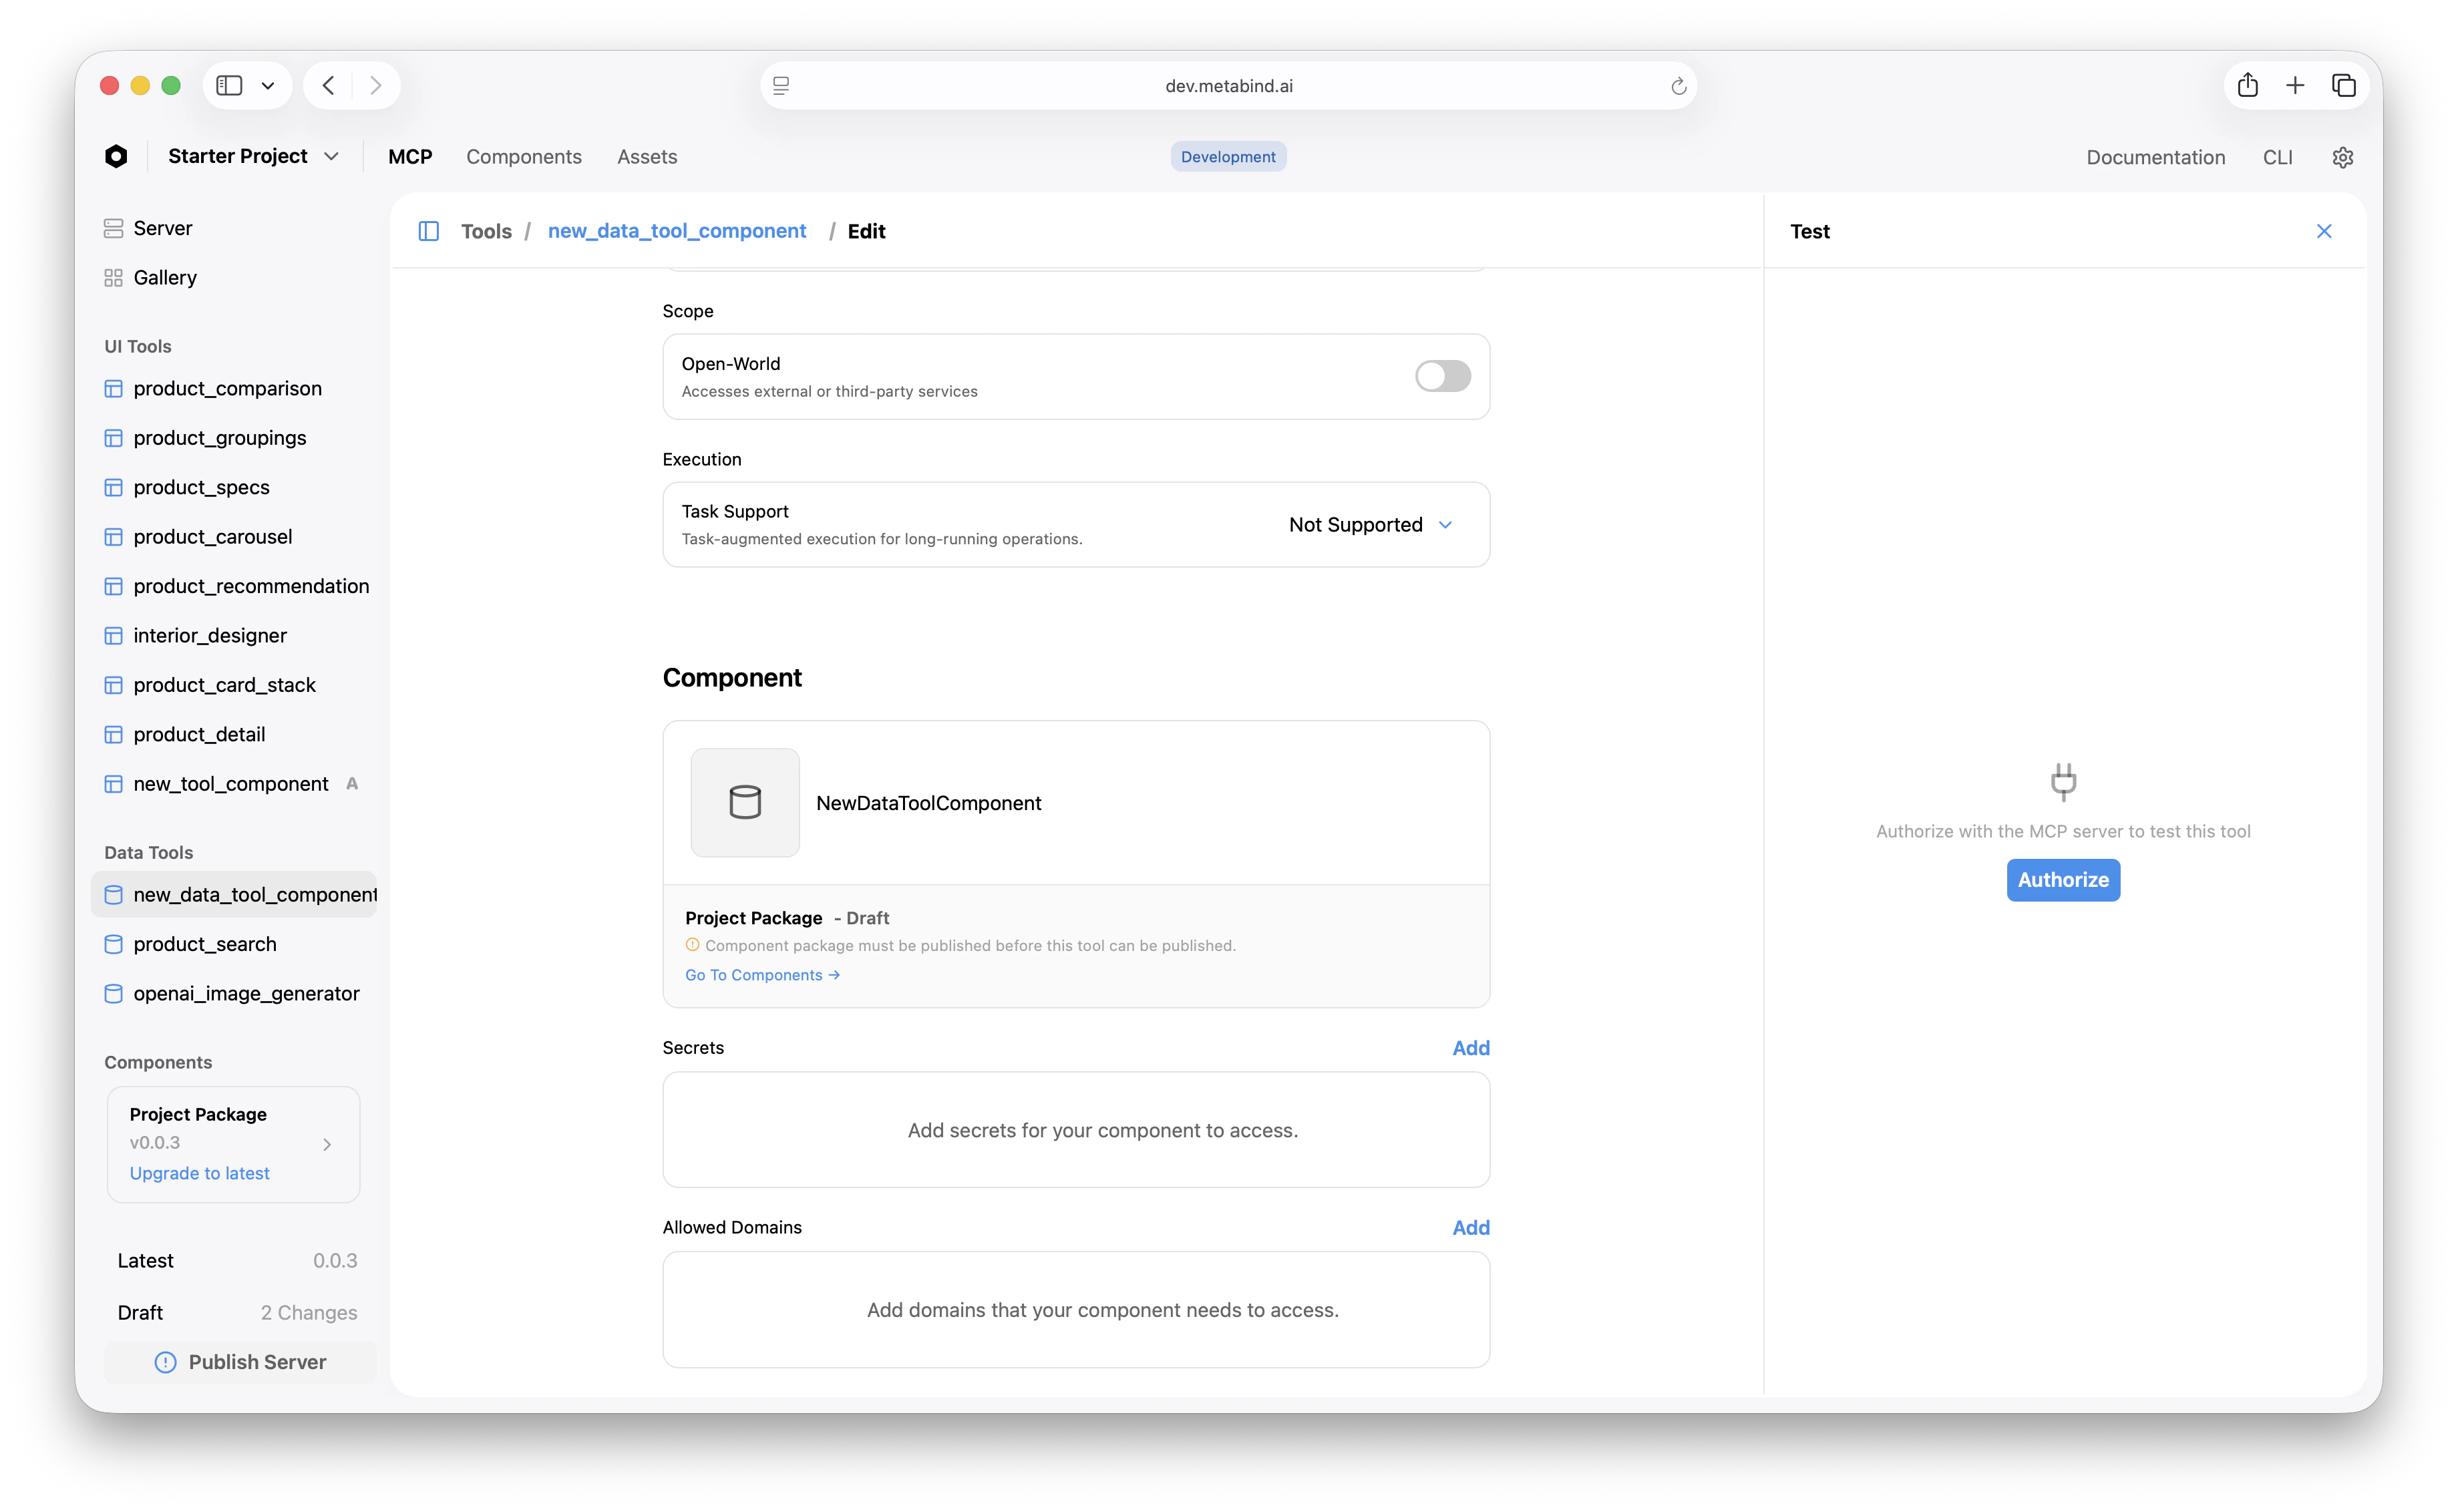
## 2. Configure secrets
Secrets are injected at runtime via `env.secrets`, never embedded in the component code or visible in the package bundle.
In MCP App Studio:
1. Open the Data Tool's edit page.
2. Scroll to the **Secrets** section.
3. Add a secret with the name your handler expects (e.g., `API_KEY`) and the value.
Secrets are encrypted at rest via AWS KMS, decrypted at read, and never returned in API responses (only the key names are exposed). They scope to the Data Tool, not the project — different tools can hold different keys.
## 3. Configure allowed domains
Outbound HTTP from the sandbox is restricted to allowed domains. The handler cannot reach an arbitrary URL — it has to be on the list.
In MCP App Studio:
1. Open the Data Tool's edit page.
2. Scroll to **Allowed Domains**.
3. Add the host (`api.example.com`) and any related hosts you'll fetch from.
If your handler tries to reach a domain not on the list, the request fails before it leaves the sandbox.
 ## 4. Create a Type that points at the data component
In MCP App Studio:
1. Open **Data Tools** in the project sidebar and click **+**.
2. Select the data component you authored.
3. Set the tool's name and description (the LLM reads this to decide when to call it).
4. Optionally configure annotations:
* `readOnlyHint: true` — the tool doesn't modify state.
* `openWorldHint: false` — the tool doesn't access third-party services. (Set `true` for tools that hit external APIs.)
* `taskSupport` — `forbidden`, `optional`, or `required` for long-running task patterns.
The input schema is auto-generated from the data component's `properties`. The output schema is auto-generated from the data component's `output`.
## 5. Test the data tool inline
Click the Data Tool. The right pane is the test panel.
1. Fill the test inputs.
2. Click **Run**.
3. The platform validates input, fetches secrets, executes the handler in the sandbox, and returns the structured output.
You'll see the JSON response in the output area. If the handler throws, the error appears here too — useful for debugging.
The test panel runs the live handler against the live API. If your API has costs or rate limits, those apply.
## Sandbox limits
Data Tool handlers run in V8 sandboxes with hard limits:
| Limit | Default |
| --------------------- | ----------------------------- |
| Execution time | 60 seconds |
| Memory | 128 MB |
| Outbound HTTP | Restricted to allowed domains |
| Filesystem access | None |
| Environment variables | None — use `env.secrets` |
| Cross-tenant data | Isolated per project |
For more, see [Sandboxed execution](/guides/building/sandboxed-execution).
## Chaining with Interactive Tools
Data Tools and Interactive Tools chain naturally. The AI calls a Data Tool to fetch data, then calls an Interactive Tool to render it:
```
User: "Show me running shoes under $150"
AI calls: product_search({ query: "running shoes", limit: 5 })
AI receives: { products: [...], total: 47 }
AI calls: product_card({ products: [...] })
User sees: rendered product cards
```
The chaining is the AI's job; the tools are independent. A Data Tool returns JSON; an Interactive Tool renders UI. Keep the responsibilities separate.
## Publish
Once the tool works on the draft endpoint, [publish the server](/guides/publishing/publishing-the-server) to promote it.
## Related
V8 sandbox, secrets, allowed domains, limits.
Pair a Data Tool with rendered UI.
The BindJS authoring loop.
Conceptual: how Data Tools fit alongside Interactive Tools.
## 4. Create a Type that points at the data component
In MCP App Studio:
1. Open **Data Tools** in the project sidebar and click **+**.
2. Select the data component you authored.
3. Set the tool's name and description (the LLM reads this to decide when to call it).
4. Optionally configure annotations:
* `readOnlyHint: true` — the tool doesn't modify state.
* `openWorldHint: false` — the tool doesn't access third-party services. (Set `true` for tools that hit external APIs.)
* `taskSupport` — `forbidden`, `optional`, or `required` for long-running task patterns.
The input schema is auto-generated from the data component's `properties`. The output schema is auto-generated from the data component's `output`.
## 5. Test the data tool inline
Click the Data Tool. The right pane is the test panel.
1. Fill the test inputs.
2. Click **Run**.
3. The platform validates input, fetches secrets, executes the handler in the sandbox, and returns the structured output.
You'll see the JSON response in the output area. If the handler throws, the error appears here too — useful for debugging.
The test panel runs the live handler against the live API. If your API has costs or rate limits, those apply.
## Sandbox limits
Data Tool handlers run in V8 sandboxes with hard limits:
| Limit | Default |
| --------------------- | ----------------------------- |
| Execution time | 60 seconds |
| Memory | 128 MB |
| Outbound HTTP | Restricted to allowed domains |
| Filesystem access | None |
| Environment variables | None — use `env.secrets` |
| Cross-tenant data | Isolated per project |
For more, see [Sandboxed execution](/guides/building/sandboxed-execution).
## Chaining with Interactive Tools
Data Tools and Interactive Tools chain naturally. The AI calls a Data Tool to fetch data, then calls an Interactive Tool to render it:
```
User: "Show me running shoes under $150"
AI calls: product_search({ query: "running shoes", limit: 5 })
AI receives: { products: [...], total: 47 }
AI calls: product_card({ products: [...] })
User sees: rendered product cards
```
The chaining is the AI's job; the tools are independent. A Data Tool returns JSON; an Interactive Tool renders UI. Keep the responsibilities separate.
## Publish
Once the tool works on the draft endpoint, [publish the server](/guides/publishing/publishing-the-server) to promote it.
## Related
V8 sandbox, secrets, allowed domains, limits.
Pair a Data Tool with rendered UI.
The BindJS authoring loop.
Conceptual: how Data Tools fit alongside Interactive Tools.